¶ Getting familiar with the UI
There is a separate page dedicated to accessing the configuration menu, and information regarding each customization/personalization options. Please visit V-Helper: Configuration and User Settings page for more information.
In order to be able to utilize V-Helper to its fullest potential, it's crucial to get familiar with its UI and where all the functions exist. Because V-Helper fundamentally seeks to utilize the original Amazon Vine website as its foundation, it does not have a separate "dashboard" to rely on and therefore, certain functions or UI elements can seem scattered.
This page is dedicated to showing all parts of V-Helper that exists throughout the Amazon Vine program.
¶ Main Extension UI
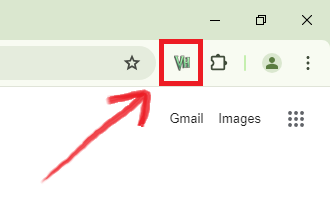
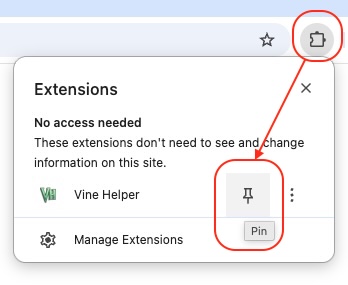
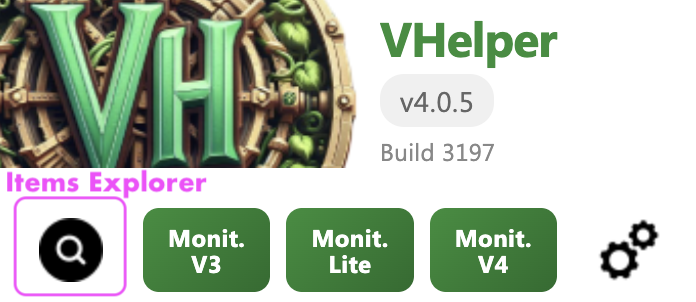
Once V-Helper is installed on your browser, the extension's configuration menu can be accessed via the "VH" icon in the top-right corner of your browser. You may need to pin the extension so it remains visible.
This is the primary UI for V-Helper, and where the "bread-and-butter" operations of the extension occurs. Most of these settings are dedicated to personalization options so that you can use V-Helper, how you want to.
The V-Helper's main UI (i.e. configuration menu):
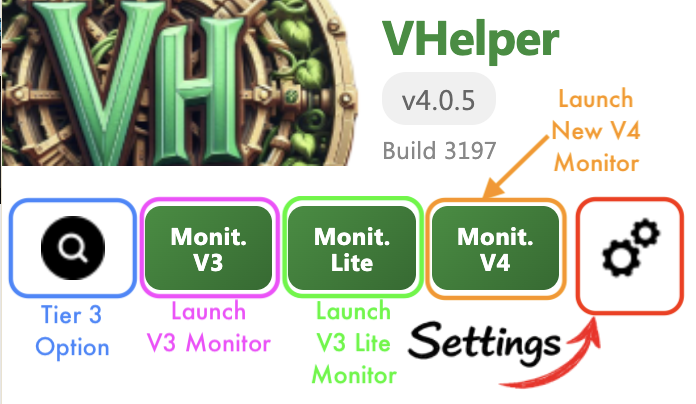
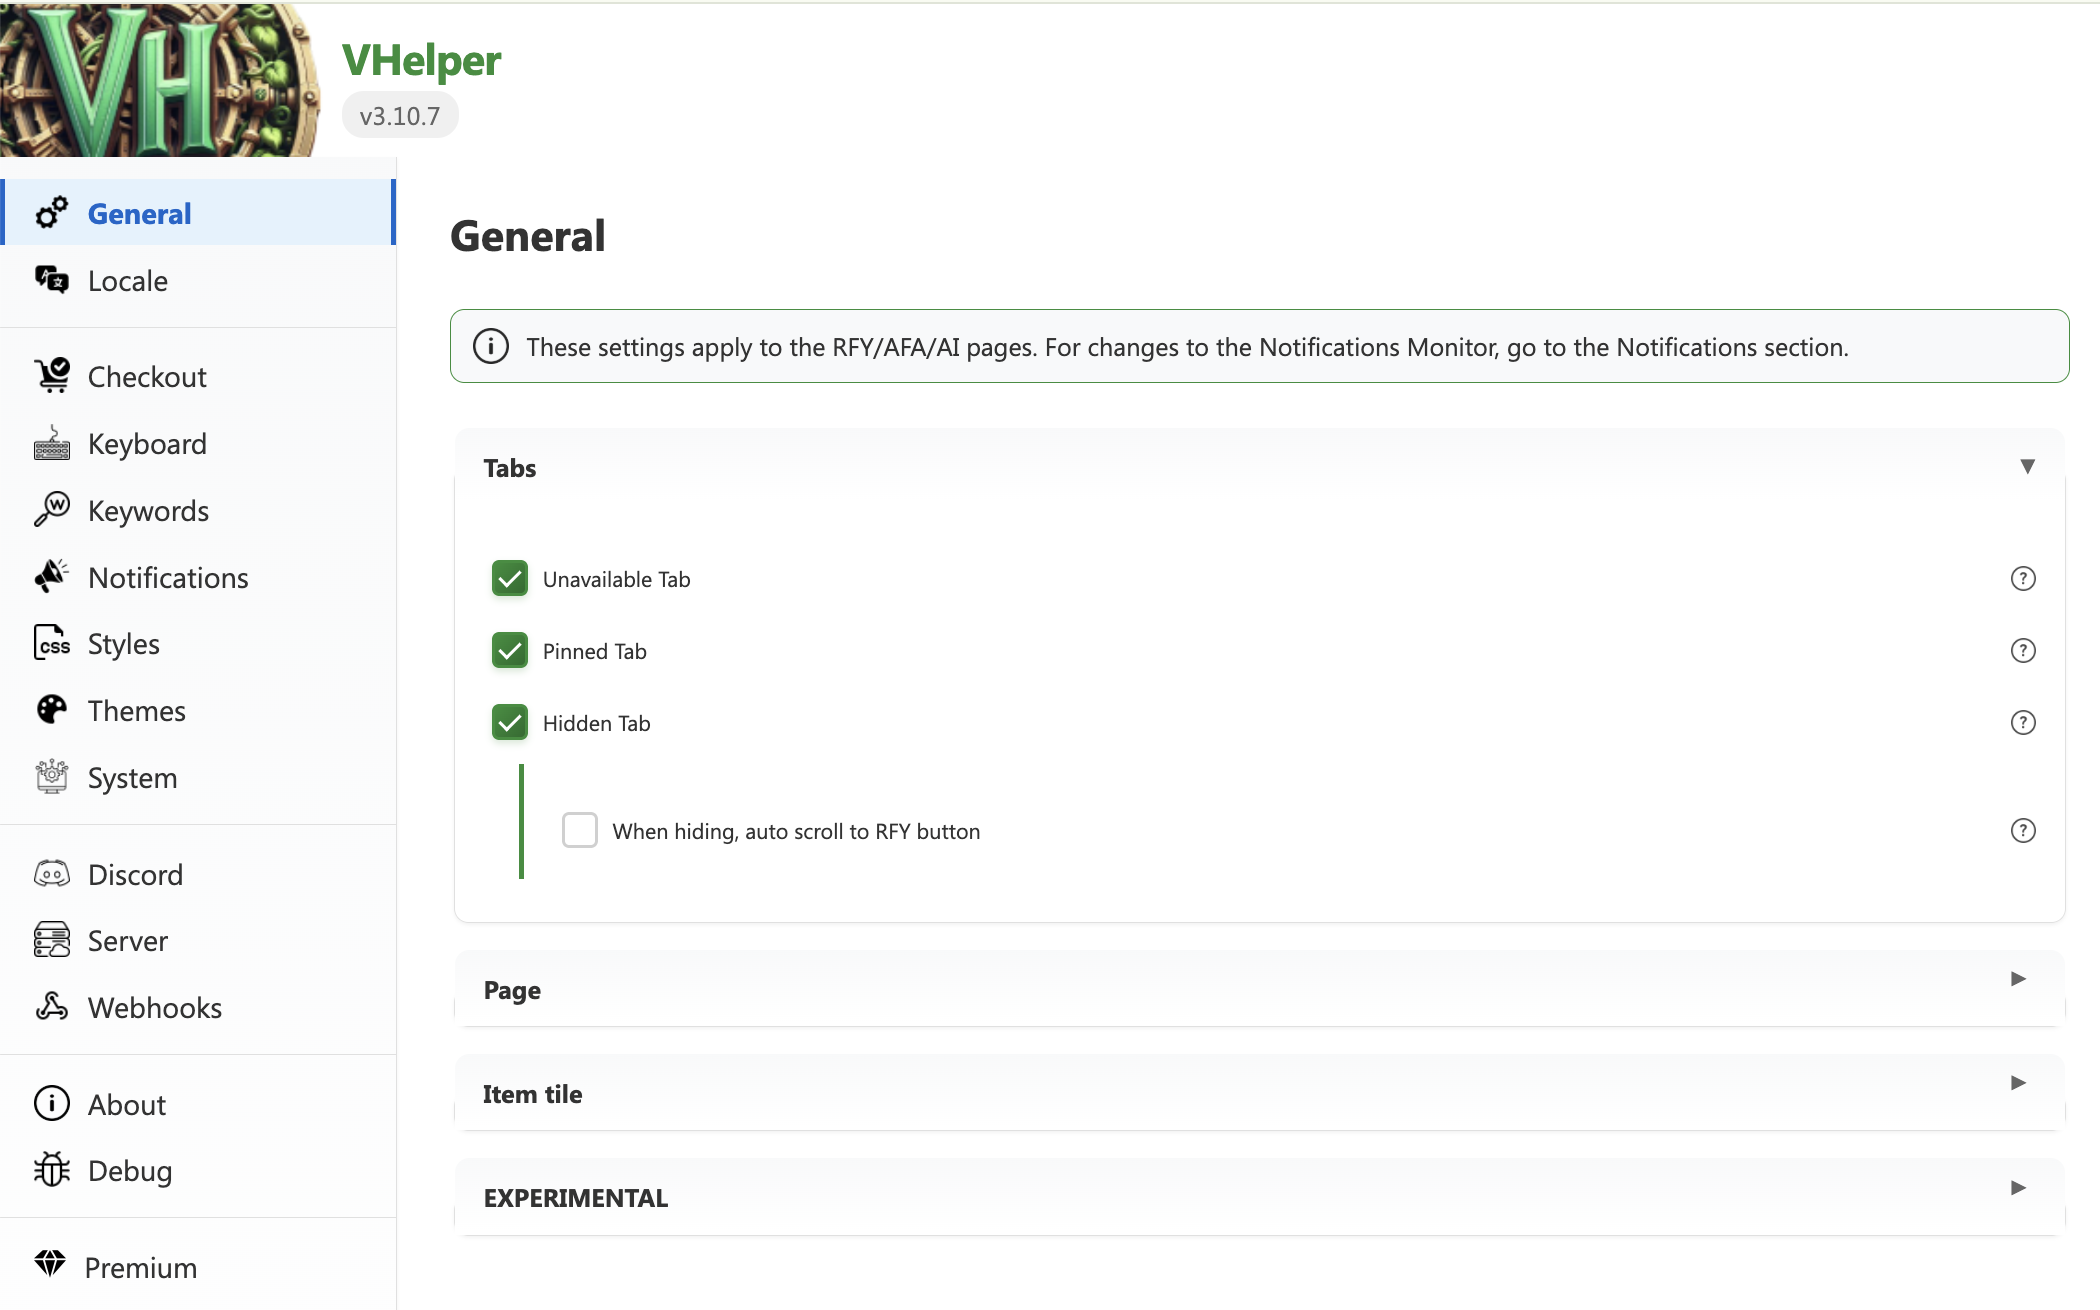
Note that the highlighted icon will open the settings in a dedicated tab, and display explanations for almost every setting:
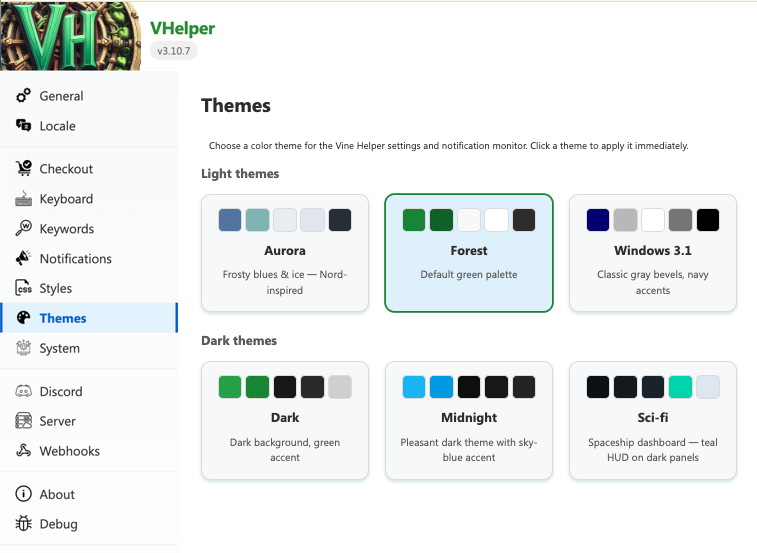
¶ Applying UI Dark Mode
In order to access dark mode for V-Helper's UI, please use the new Themes setting. There are three Light and three Dark themes to choose from:
¶ Vine Website UI
The Amazon Vine website is where you will inevitably spend the most amount of time, and it's pertinent to be familiar with some of the V-Helper UI you will be interacting with on a daily basis to get the most out of the extension.
¶ Main Toolbar
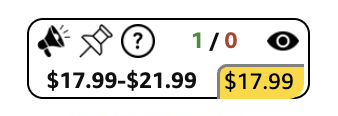
The toolbar is arguably the most integral part of V-Helper as most actions and information are handled by this interface. The toolbar may not look exactly the same as it does in the images below as certain features need to be activated before use.
![]()
This is a feature that must be activated within the '"Brenda"' tab of V-Helper configuration menu.
If you would like to announce certain items to the Amazon Vine Discord server via Brenda, you may do so using this button. This is also known as the 'speaker' button; this will send item details to region-specific alerts channels for everyone to see.
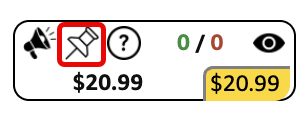
This is a feature that must be activated within the 'General' tab of V-Helper configuration menu.
If you would like to pin items of interest, you may do so using this button. This will allow items you pin to carry-over to any pages you visit within the confines of Amazon Vine website. More information on the Pinned Tab is available below.
If you would like to see some advanced details about the item, you can click this icon which will open a small popup with the item's ASIN #, the date/time the item was first discovered by V-Helper and which keywords the item is matching, if any.
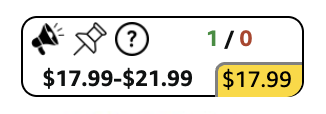
If any 'request product' attempts (i.e. order attempts) are made, the statistics with 'order successful' and 'order unsuccessful' icons will replace the voting system in the toolbar. This will indicate the number of successful orders and/or the number of unsuccessful attempts that were made by V-Helper users. It's important to remember that these statistics only account for users who've attempted while using the V-Helper extension. More information on the Unavailable Tab is available below.
This is a feature that must be activated within the 'General' tab of V-Helper configuration menu.
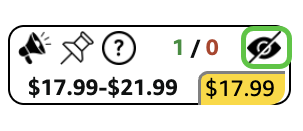
If you would like to hide undesirable items, you may do so using this button. This is also known as the 'eye' button. This will allow you to hide items manually, and this can be used to hide items that were not hidden using auto-hide keywords. If you would like to unhide any previously hidden items, you may toggle this button, although this action is unavailable to items that were hidden using auto-hide keywords.More information on the Hidden Tab is available below.
This section displays the ETV of an item. Because V-Helper does not fetch data automatically, the ETV is only displayed in the toolbar once a V-Helper user clicks on the See details button to trigger V-Helper to gather relevant information on a specific ASIN. Sometimes, the ETV value may be displayed as a range if different variants have different FMVs.
This is a feature that must be activated within the 'General' > Item Title section of V-Helper settings menu.
This section displaced the Amazon price of an item. You can use this to compare the ETV to the Listed Price.
¶ Tab Options
There are 4 different tab options within V-Helper.

¶ Available Tab
The Available Tab shows all items enrolled in the Amazon Vine program.
Unless an item is automatically deemed unavailable by the extension (more below), most items will show up in this tab first. However, items that match the auto-hide keywords will be automatically added to the Hidden Tab as exceptions, even if it's new to the Amazon Vine program.
¶ Unavailable Tab
The Unavailable Tab shows all items that are detected be unavailable based on community data.
If a V-Helper user attempt to order an item and receive the specific error ITEM_NOT_IN_ENROLLMENT, the item will be flagged as unavailable and moved to the unavailable tab.
In a similar fashion, V-Helper automatically records the number of successful and unsuccessful 'request product' attempts. If the user requests a product and is successful in securing an item, then 1 "successful" attempt is recorded. If the user requests a product and receives the ITEM_NOT_IN_ENROLLMENT error message, then 1 "unsuccessful" attempt is recorded.
¶ Hidden Tab
The Hidden Tab shows all items that are hidden based on your preferences.
This is a feature that must be activated within the 'General' tab of V-Helper configuration and user settings.

By default, no items will be displayed under the Hidden Tab. You can add auto-hide keywords via the 'Keywords' tab of V-Helper configuration menu for items to be automatically sent here, even if it's new to the Amazon Vine program. This feature relies on REGEX as the language of choice to specify patterns for items you do not want to see.
There is a separate page dedicated to REGEX. Please visit How Do I Use REGEX? page for more information.
On the other hand, you are also able to manually hide items you do not want to see. Simply click on the 'hide item' icon on the toolbar to send items to the Hidden Tab.
With any items that were automatically hidden using the auto-hide keywords, you will not have the option to un-hide them manually. For any items that were hidden manually using the 'hide item' icon, you can un-hide them by clicking on the 'eye' icon again.
Hidden items are stored locally on your device. As a premium option, if you use V-Helper across multiple devices, and you would like to sync hidden items between devices, you can enable the Hybrid cloud storage mode within the 'Server' tab of V-Helper configuration menu.

As long as you enable 'Store Hidden Items Remotely' feature, use the UUID of your primary device on all of your other devices, and copy-and-paste all of the auto-hide keywords, your hidden items should match across all of your devices.
¶ Pinned Tab
The Pinned Tab shows all items that are pinned based on your preferences.
This is a feature that must be activated within the 'Server' tab of V-Helper configuration and user settings.
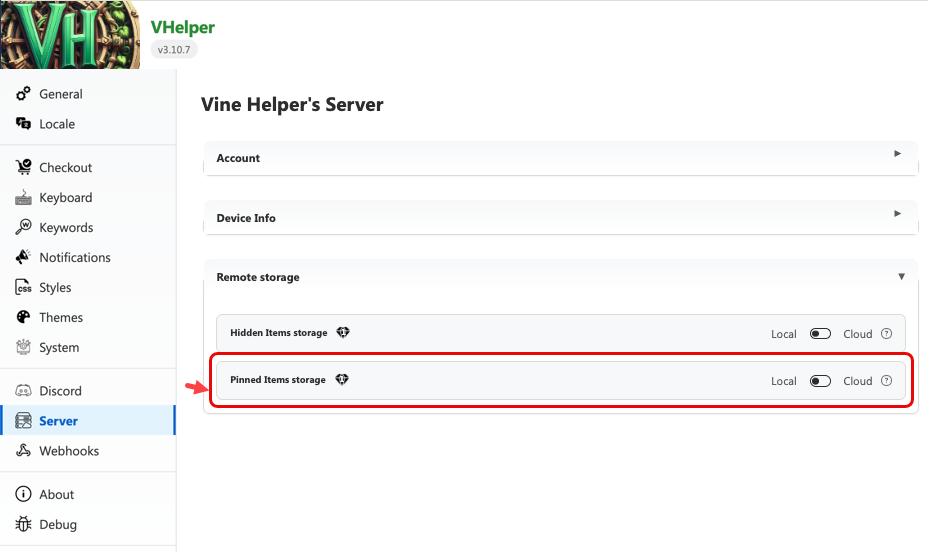
By default, no items will be displayed under the Pinned Tab. You are able to manually pin items of interest using the 'pin' icon on the toolbar to send a copy of the items to the Pinned Tab.
With any items that were pinned, they will carry-over and be visible under the Pinned Tab no matter which page you're on, even you're under different primary tabs of Amazon Vine (e.g. pinned AI items can be viewed even when you're on the RFY page). Under the Pinned Tab, you will see a slightly different toolbar.
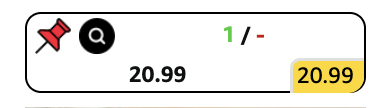
If you would like to access the regular V-Helper toolbar functions and/or order the item, you can click on the 'magnifying glass' icon search for the item. If you would like to un-pin a certain item, you can click on the 'pin with a slash' icon. Note that the 'reload' icon is a premium feature for remote stored pinned tab which will refresh some attributes, such as if the item is unavailable or updated internal data should any have changed since the pin occured.
¶ Notification Monitor UI
While it's easy to miss the Notification Monitor, it is one of the more powerful features of V-Helper that makes the extension stand out.
¶ What is a Notification Monitor?
It is a feature used to keep a temporary history of item notifications on a single page. It also helps for you to keep track of new items coming in, and at what times an item was seen first by a V-Helper user.
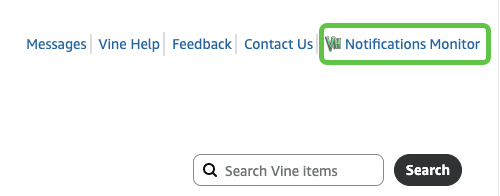
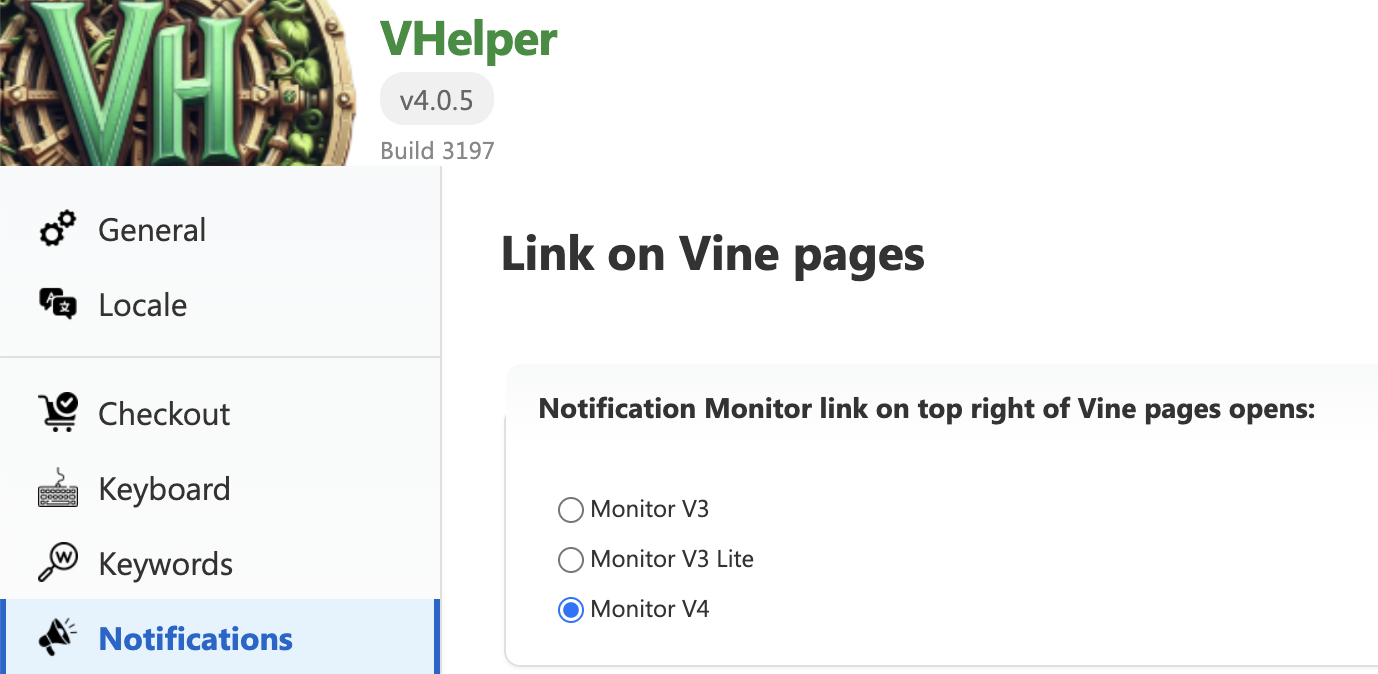
This is a feature that can be accessed through V-Helper configuration menu, via the link on most vine pages. Monitor V3 Lite & V4 activates a new popup when you click on See Details and is better on memory. This new pop up has details on all items including variants. Monitor V3 and will open the original style pop up when you click on See Details.
Clicking on Notifications Monitor from the RFY/AFA/AI pages will open Monitor the version chosen in notification settings.
¶ What can I do with the Notification Monitor?
Once opened, the Notification Monitor will look rather empty. However, as new items are introduced during a drop, item listings will start to occupy the page.
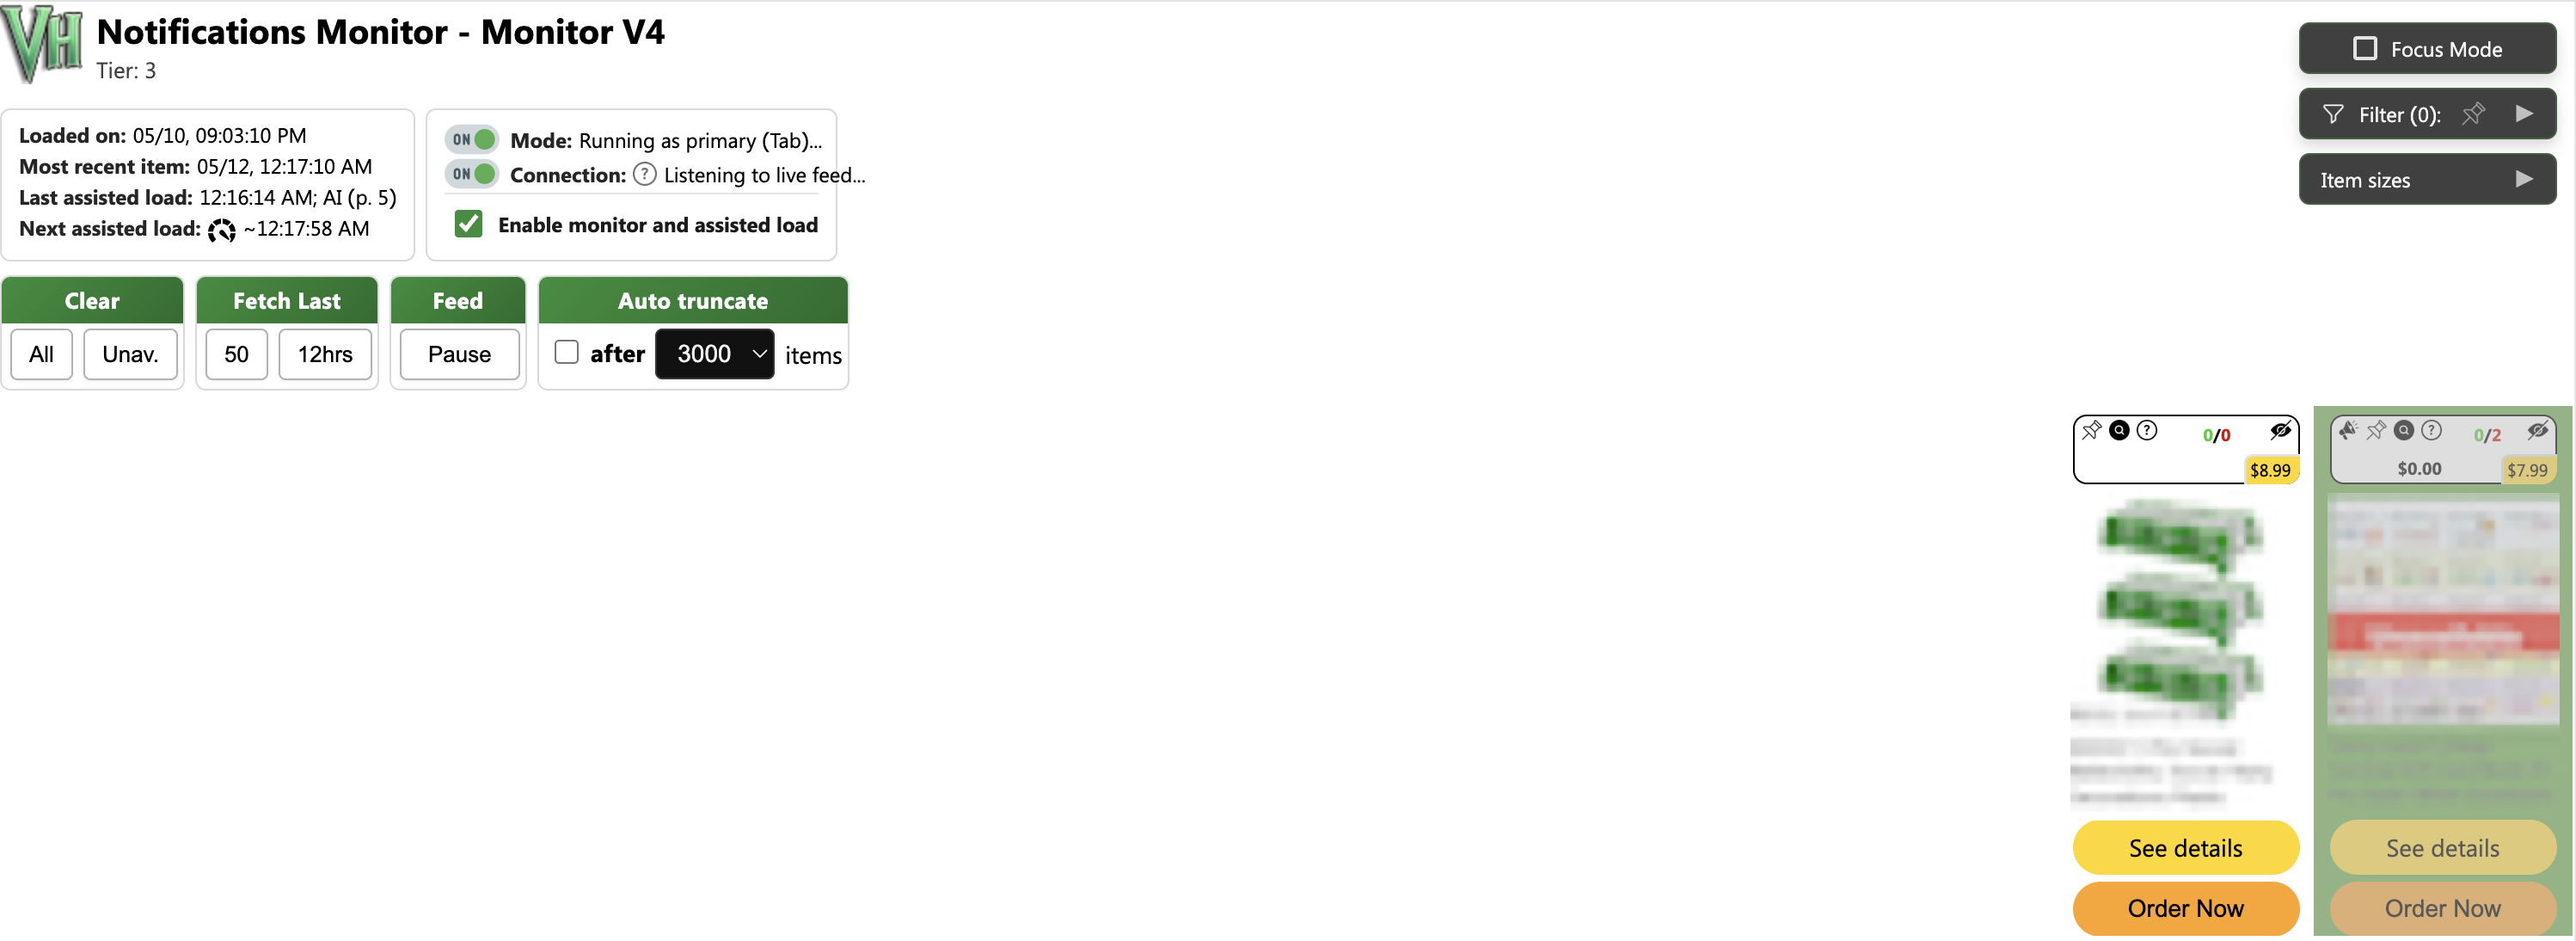
As drops occur, the notification monitor page works automatically, and does not require any action or intervention on your part. With each item listing you are able to:
- click on the product title to open up a new tab that leads directly to the Amazon listing for the product
- click on the 'pin' icon to pin the item
- click on the 'magnifying glass' icon to direct-search for the item to order the item
- click on the '(?)' icon to display additionnal advanced data about the item.
- click the 'megaphone' icon to announce the item to the Brenda API of one of the discord servers.
- (very rare) click on the 'red exclamation' icon to report the VH user who sent a false, counterfeit, and/or non-Amazon item notification to VH's server.
Please note that false reports, and/or abuse of the reporting feature can lead to a permanent ban from V-Helper. It should only be used to report fake items which are not truly listed on vine, should that ever happen.
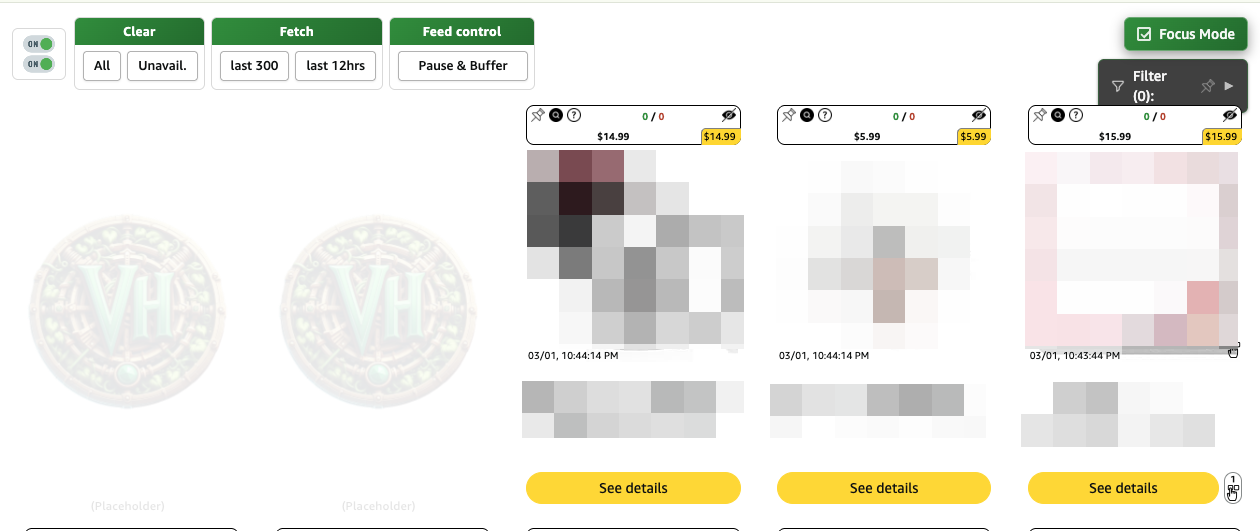
¶ Interacting with the Interface
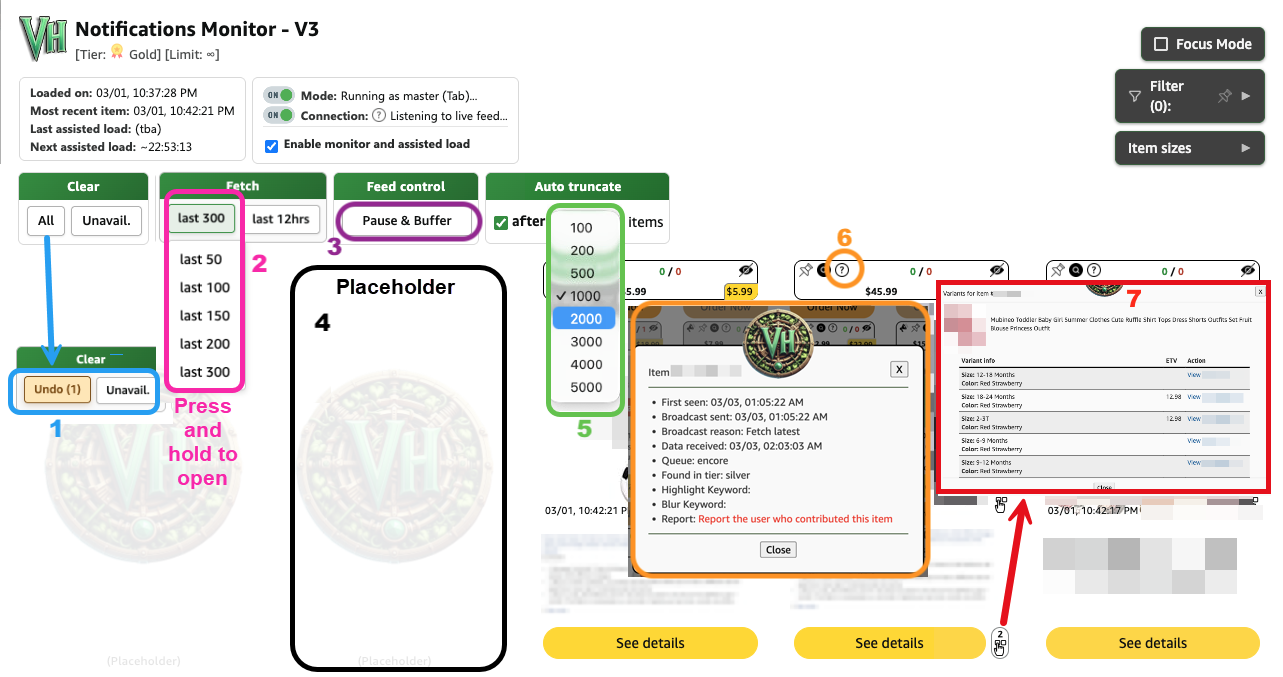
V3 and V3 Lite
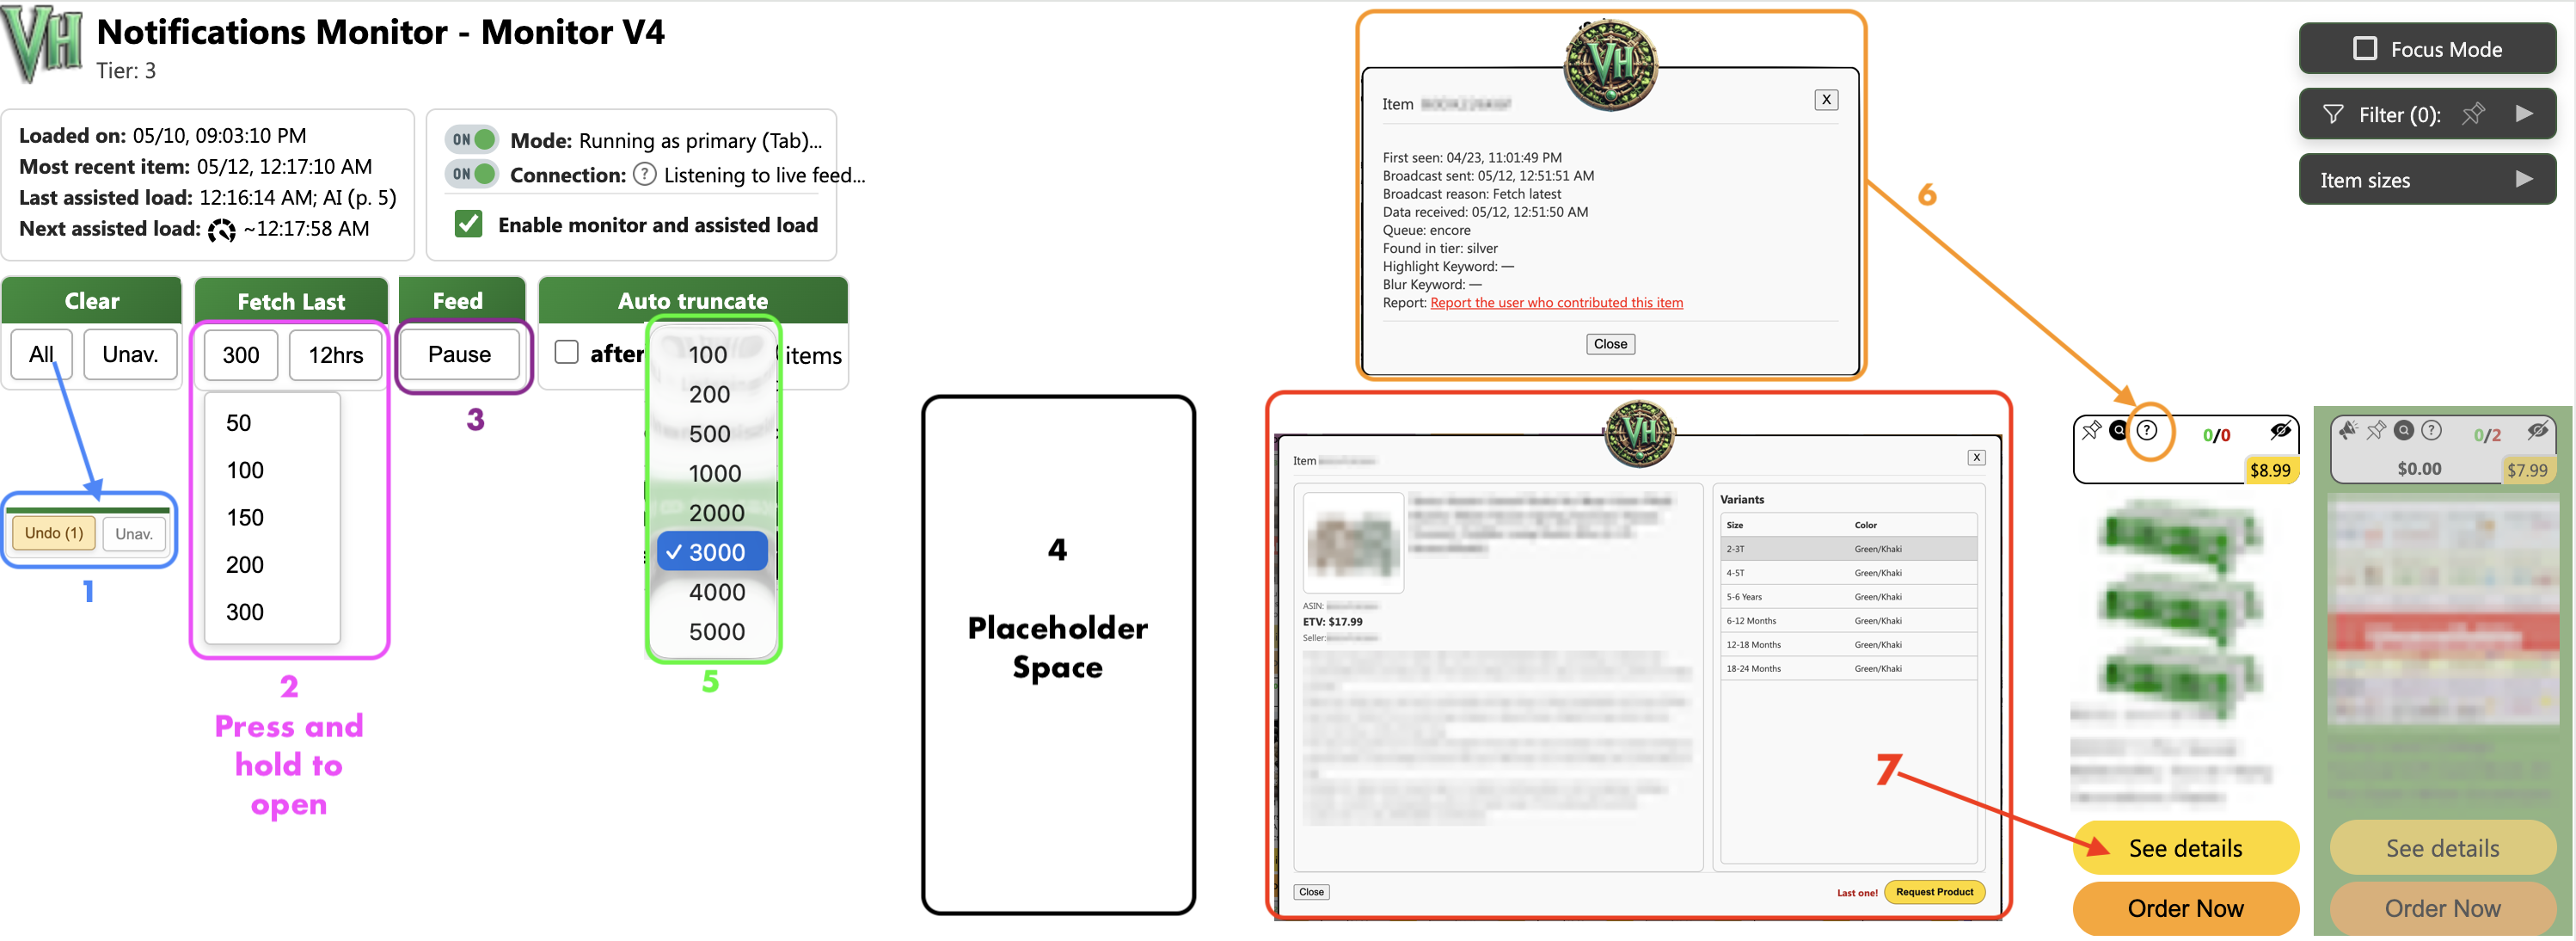
V4
This is a feature can be customized in the Notifications > Notifications Monitor setting of V-Helper configuration menu.
Click on All to clear all previously loaded items; By default a confirmation dialog will appear. Click on Unavail to clear items that are no longer available to order.
For the free tier and tier 1 users, this will only show 100. Tier 2 will show up to 200 and tier 3 up to 300 items. Fetch last 12 hours will return up to 1000 items.
When items are dropping quickly, it can become difficult to keep track. You can use this button the pause items from loading. You can turn on the setting to show a red overlay when paused.
The red overlay feature can be activated within the 'Notifications' > Notificataions Monitor section of V-Helper settings menu.
The placeholder keeps items from shifting while items are dropping.
The placeholder feature can be activated within the 'Notifications' > Notificataions Monitor section of V-Helper settings menu.
By default, this is set to 1000. You can turn it off or choose the max number of items in view at a time.
If you would like to see some advanced details about the item, you can click this icon which will open a small popup with the item's ASIN #, the date/time the item was first discovered by V-Helper and which keywords the item is matching, if any.
For V3 and V3 Lite, if there are variants on an item, clicking the variants button will open a pop up showing all variants and thier ETV (if it was clicked). Clicking on 'View ASIN' will open the item in a new tab.
For V4, variants are included in the See Details pop up.
¶ Focus Mode
Focus Mode disabled

Focus Mode Enabled
¶ Filter and sort
You can use the Filter box to search, filter and sort results. The count in the title bar will change based on the chosen options. Only new items that match the filter will be added to the view.
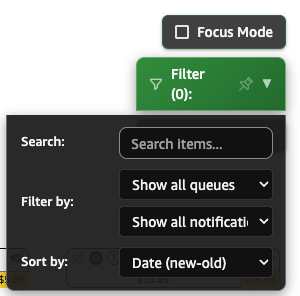
Search
Enter a word into the search field to filter the items in the notifications monitor. Note - this search only looks at the title of the item.

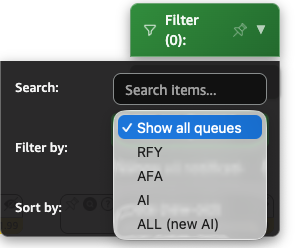
Filter by Queue
Choose to filter by RFY/AFA/AI.
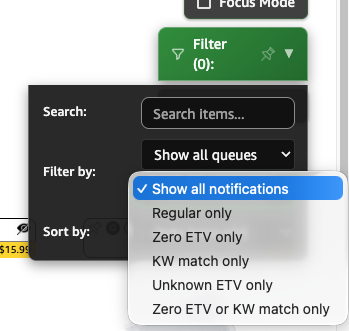
Filter by Notification Type
Choose to filter based on the notifications. Filtering by Zero ETV will only show items that are Zero ETV, etc.
¶ Item Sizes
You can use the sliders to adjust the item sizes. This can help with fitting more items on screen.
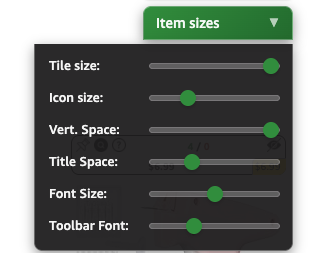
The adjustment sliders can be hidden after you have confirmed your settings within the 'General' > Page section of V-Helper settings menu.
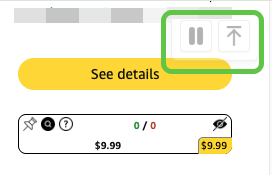
¶ Pause and Back to top
When scrolling through the items on the Notifications Monitor, you will see an overlay button for Pause and Back to top. You can use these to pause the feed or to quickly get to the top of the page.
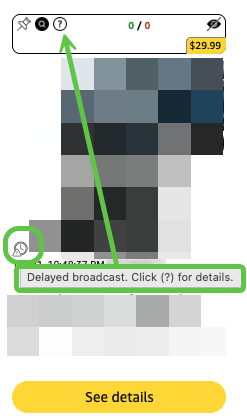
¶ Delayed Broadcast
This icon (not clickable) is visible when it is not the first time an item loaded to the feed. Note, if you're using Fetch, these items will be skipped. The reason for the delay is shown when you click on the info (?) button.
¶ (premium) Variants
When an item has known variants, the icon and button will be displayed.The icon is not clickable, but the button next the See Details button opens a pop up showing all possible variants. Note: the button is only displaced in V3. For V4 variants are shown in the See Details pop up.
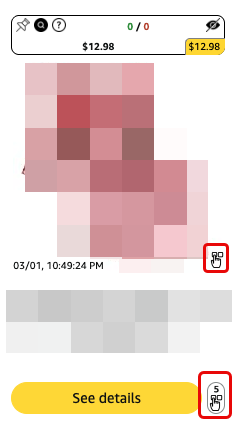
The variants feature can be activated within the 'General' > Item Title section of V-Helper settings menu.
¶ Limitations
As powerful and versatile the Notification Monitor can be to your Vine workflow, it is important to understand that it has its set of limitations. It is only to be used as a secondary tool to assist in keeping history of what new items have dropped, at what times the new items dropped, and in accessing the ASIN of new Amazon Vine products.
It is important to not treat the Notification Monitor as the sole source of new item notifications during a drop. As the Notification Monitor only reports new items when a V-Helper user finds it. If no one is browsing for items, chances are non-users of V-Helper will find the item faster and order it before V-Helper is even aware it existed.
¶ (premium) Items Explorer UI
Items Explorer will give you access to search the items which have been discovered by V-Helper users in the last 90 days. It offers a lot of search options, filters and sorting possibilities.
¶ Search
Enter ASIN or title and filter by queue, ETV and availability. Sort by date.

If there are variants, clicking on 'load variants' under the item will add additional lines to the results with the variants.
¶ Interacting with the items
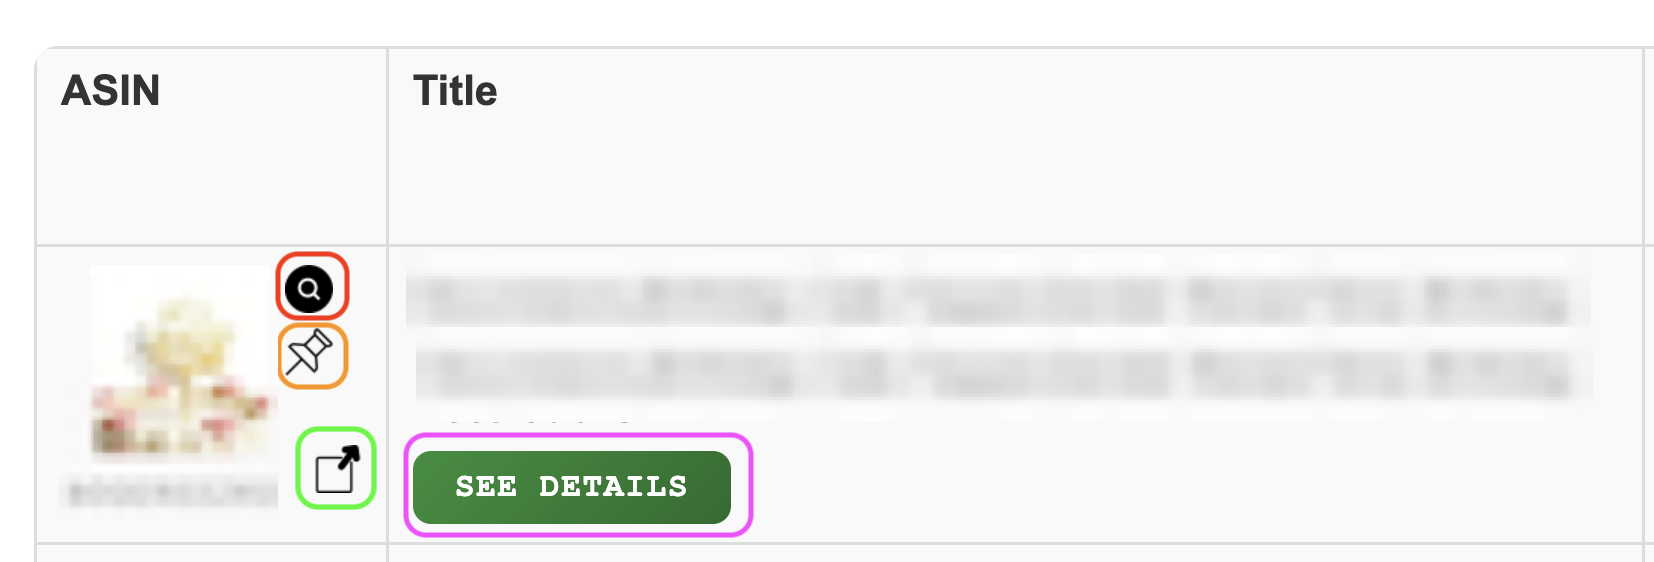
- Click on the search icon (magnifying glass) to search vine for the first few words of the title.
- Click on the pushpin to pin the item. It will be added to the pinned tab on the RFY, AFA and AI pages. You will need to visit the pinned tab to remove the pin.
- Click on the share button to open the Amazon listing for the product.
- Click on See Details to open the usual "See Details" pop up in a new tab.
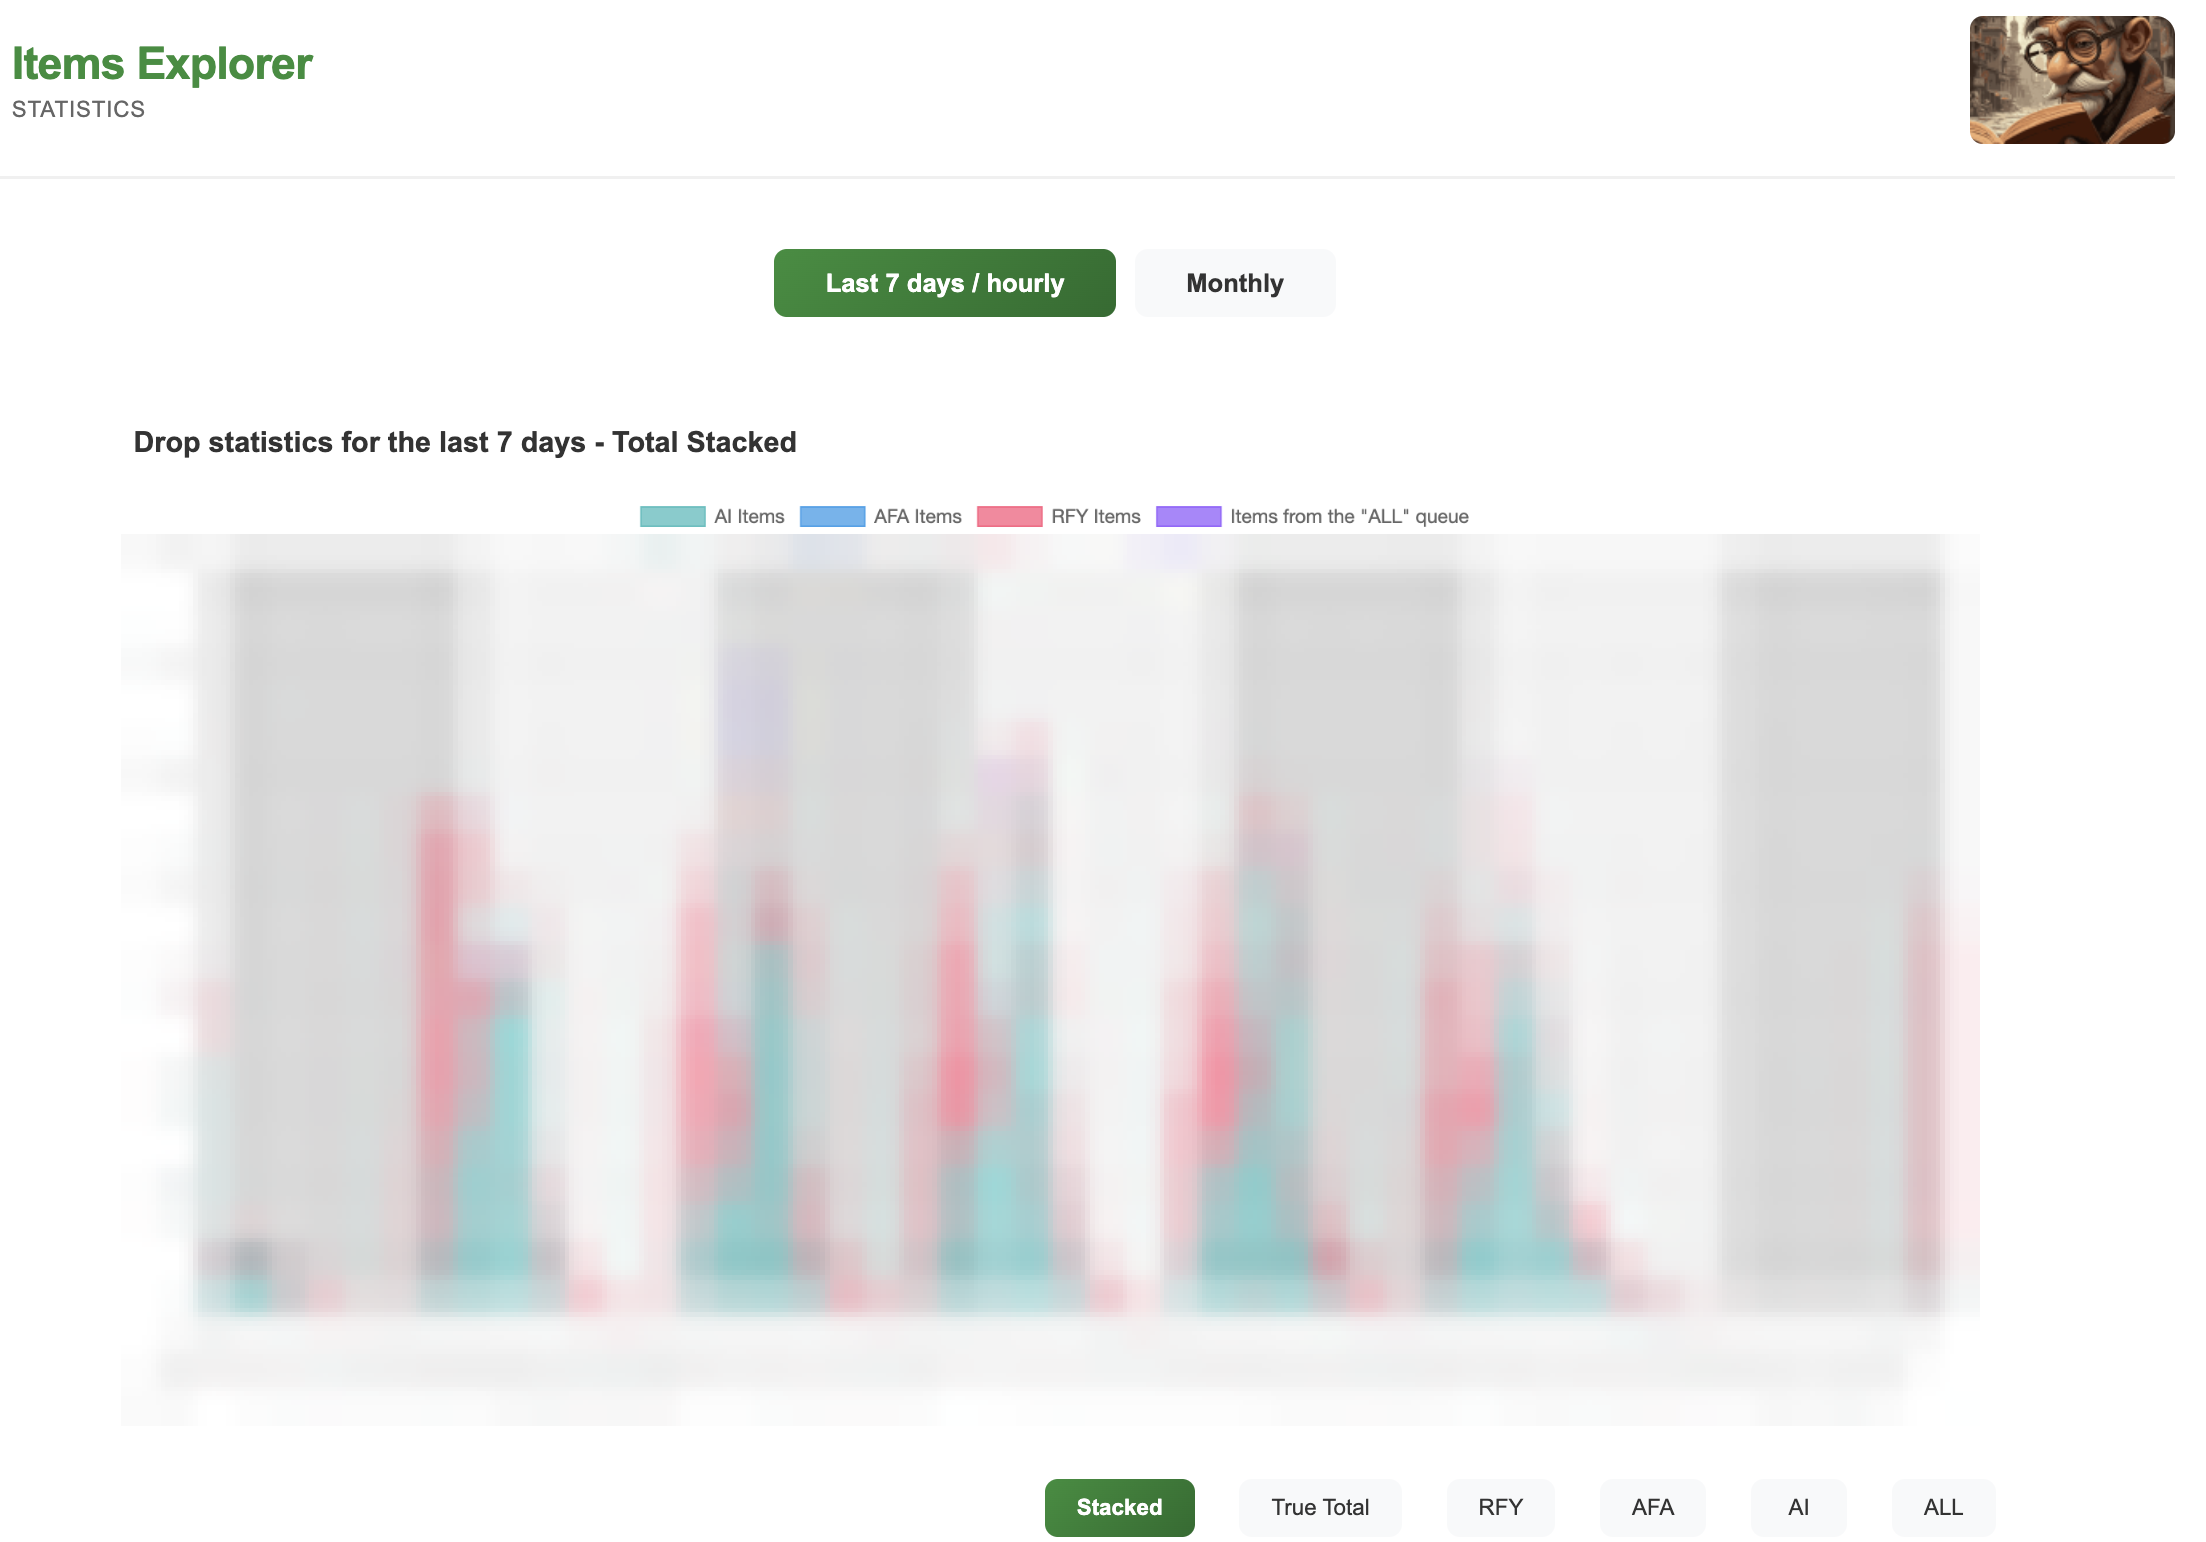
¶ View Drop Statistics
Click on view drop statistics to load the page showing drop statistics. This gives you access to the monthly numbers as well as detailed hourly statistics for the last 7 days.
This is a good way to compare Vine's offering throughout the year, and to be aware of the drop time that is relevant to you.
¶ Review Page UI
Did you know that V-Helper also has features when it comes to writing reviews? As outlined in our FAQ, while V-Helper does not and cannot write reviews for you, it can make your job easier with basic review functionalities.
¶ Using Review Templates
'Templates' is a feature of V-Helper that allows the user to save and recall drafted and formatted versions of reviews. Instead of starting from scratch with every single review, this functionality helps Vine reviewers to quickly summon an individualized review structure they need for specific product categories, specific items, or personal review styles (e.g. bullet point reviews).
This is a feature that is automatically enabled upon installation of the extension, and does not require any activation by the user. It is available at the bottom of every review page (below Add a written review section), however, this feature is only available for Vine items being reviewed via the Amazon Vine webpage.
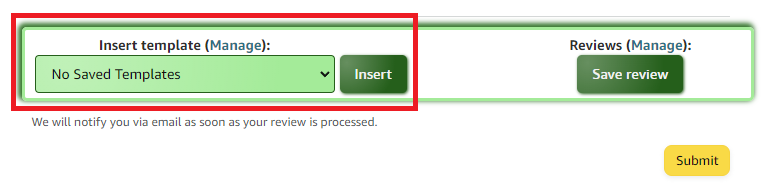
In order to use this feature, click on the Manage button to open up the 'Manage Review Templates' extension page in a new tab.
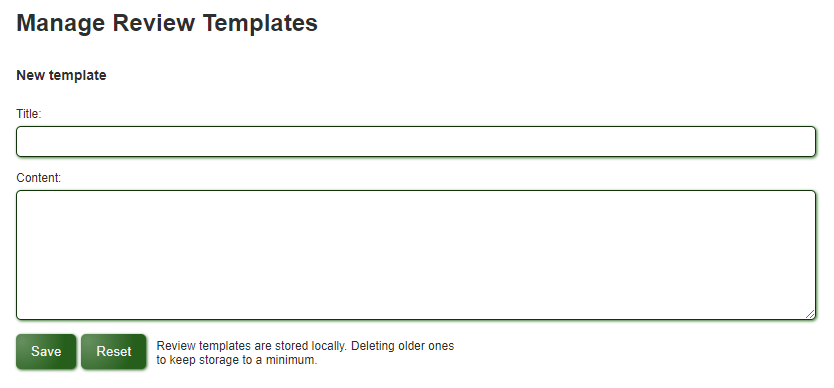
Using the text box provided, write down any format of review you prefer. Make sure to add a title that's easily identifiable and one that matches the intended purpose of the review template. Once you are satisfied with the review template, press Save to save the template.
Please note that the title for the template is different than the headline for the review itself. The title is only to identify the template purpose, and the headline for the review must be added separately.
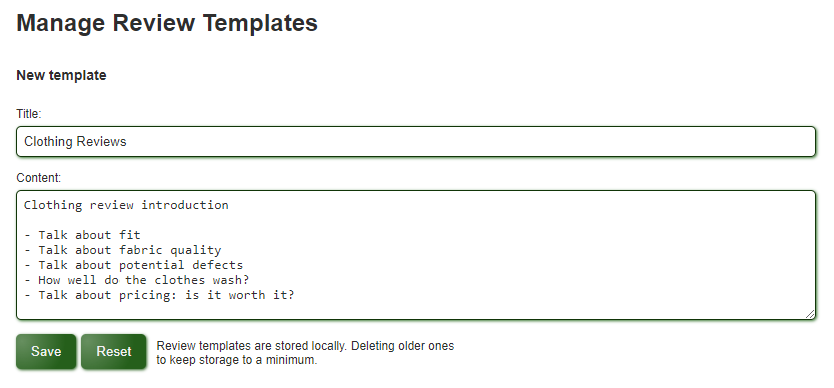
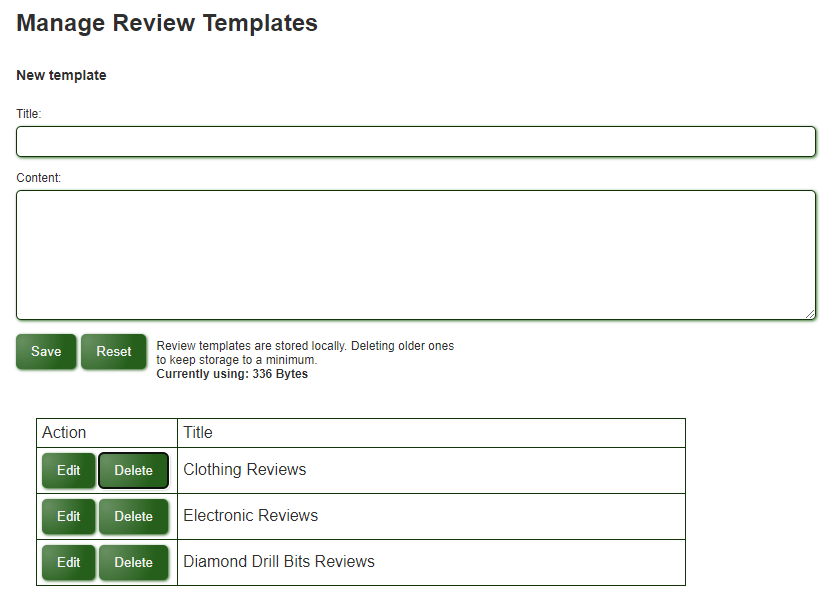
You are free to add as many review templates as you wish. These templates are saved locally on your device, so please do be aware that they take up your storage space. You can also click on Edit to edit the selected review template, click on Delete to delete any unwanted templates, or click on Reset to clear the text boxes.
After you've managed and organized all of your review templates, close the tab and go back to the review page for any product. Refresh the page, and you should now be able to see all of the templates in a drop-down menu. Choose the template of your choice, and click Insert to copy and populate the exact template onto the review text box. You are now free to proceed with the actual review as normal. Please note, a review headline must be added separately as it is not included with any review templates.

¶ Saving Reviews for Later
'Save review' is a feature of V-Helper that allows the user to save an exact copy of both the review headline and review content. Due to Amazon Vine's rather rudimentary nature, written reviews can be easily lost should your tab close unexpectedly, computer abruptly shut down, and/or review be rejected for violating community guidelines. While there isn't a completely fail-safe way to save all of the reviews via the browser, V-Helper can assist in summoning incomplete or previously-saved reviews for revision.
This is a feature that is automatically enabled upon installation of the extensions, and does not require any activation by the user. It is available at the bottom of every review page (below Add a written review section), however, this feature is only available for Vine items being reviewed via the Amazon Vine webpage.
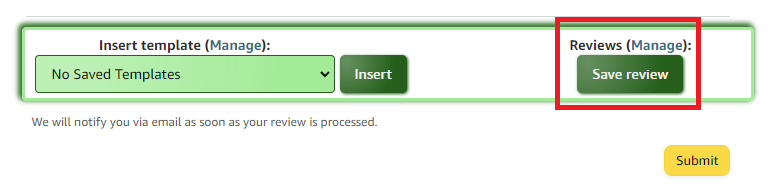
To use this feature, start by writing a review on any product as normal. Make sure to include both the review headline (i.e. review title) as well as the body of the review (i.e. review content). Again, whether the review is complete or incomplete does not matter. Once you feel like you need to save the review in its current state, press Save review.
NEW FEATURE - Upload multiple photos and videos at once.
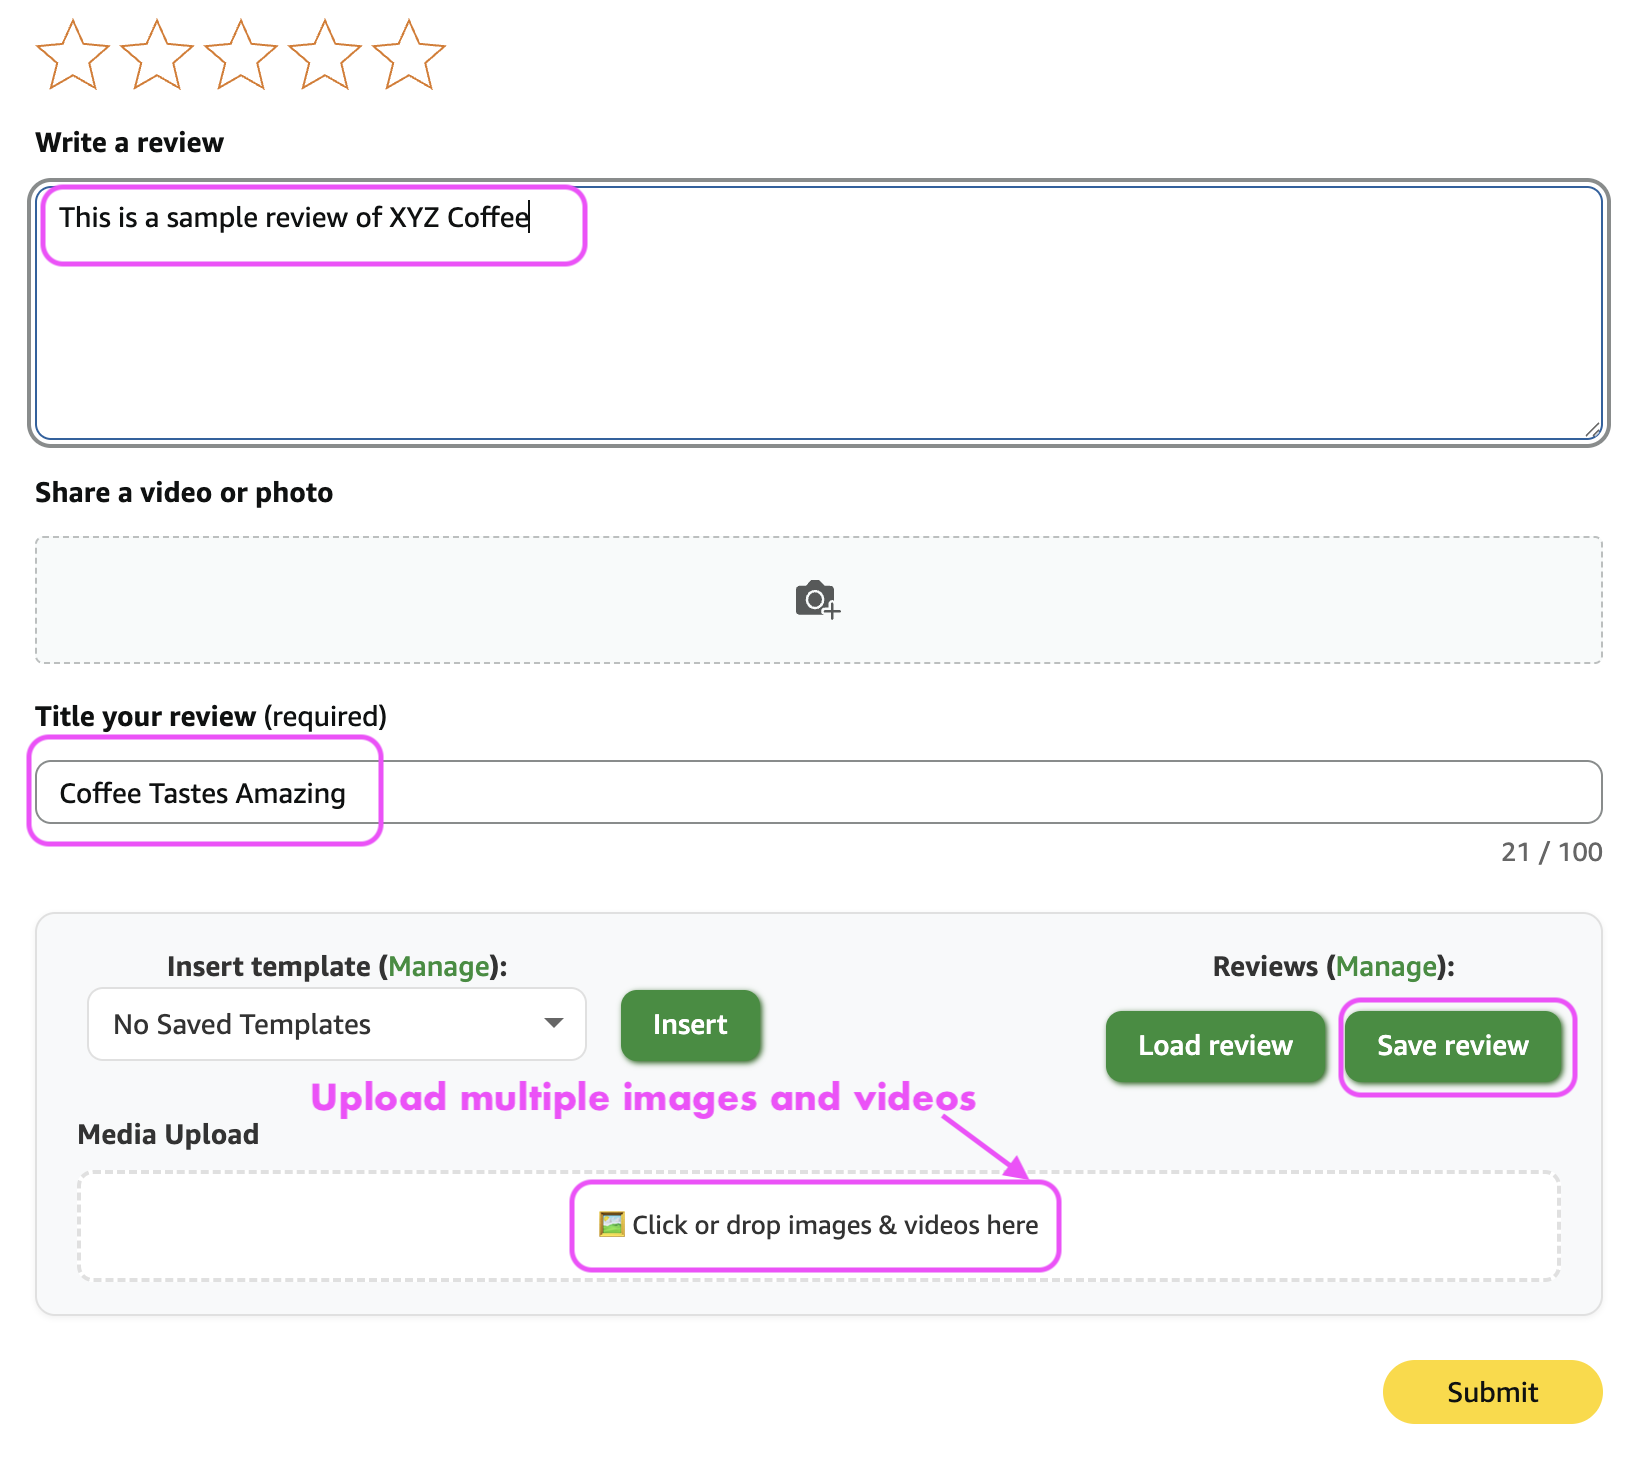
After pressing Save review, if the process was successful, you will get a temporary message that says Review saved! to confirm the action was taken. You may repeat this process for as many reviews as you would like. At this point, you are free to close the tab to return at a later time. If you need to retrieve any of the saved reviews and/or manage the list of saved reviews, click on the Manage button to open up the 'Saved reviews' extension page in a new tab.

Below the empty text boxes, you will see the list of saved reviews. This includes action boxes, headline (i.e. title) for each review, ASIN that was associated with your saved review, and the date in which the review was created and saved (MM/DD/YY). These reviews are saved locally on your device, so please do be aware that they take up your storage space. At this point, you can click on View to summon the saved review headline and content or click on Delete to permanently delete the saved review from your device.

When you click on View to populate the text boxes with the selected review, you are summoning both the review headline (i.e. title) and the review content (i.e. body of the review). At this point, you can highlight the texts using your cursor to copy & paste for your product review.
Please note that saved reviews cannot be edited in this state. If your review is already written on the product review page, you can click on
Save reviewbutton to overwrite any reviews for a specific ASIN. If your review is only in a saved state, you must copy & paste the texts back onto the product review page and then save them manually again to overwrite any previous progress.
